How to Use CapCut for Professional-Looking Explainer Videos
Create stunning, high-quality explainer videos with ease using CapCut's free and advanced video editing features.
TUTORIALS
Ocotobx.Studio
11/27/20244 min read


How to Make an Explainer Video Using CapCut
Creating an explainer video doesn’t have to be daunting. With the right tools and a clear plan, you can craft engaging videos that tell a story, explain a concept, or showcase your brand. One such tool that stands out is CapCut. In this blog post, we’ll explore how you can use CapCut to make an impactful explainer video, step by step.
What is CapCut?
CapCut is a versatile video editing tool available for both mobile and desktop users. Developed by ByteDance, the creators of TikTok, CapCut is a freemium software that’s easy to use and packed with features. Its intuitive, mobile-first design makes it especially appealing for beginners and content creators on the go.
Why Choose CapCut?
CapCut’s user-friendly interface and powerful editing tools make it a favorite for creating everything from quick social media clips to detailed explainer videos. Whether you’re new to video editing or a seasoned pro, you’ll appreciate how quickly you can start creating without a steep learning curve. Plus, it’s available on both phones and desktops, offering a seamless experience across devices.
Steps to Create an Explainer Video with CapCut
1. Develop Your Idea
Start with a clear idea of your video’s purpose. Are you explaining a product, sharing a concept, or delivering an important message? Knowing your audience and the message you want to convey is the first step toward creating a compelling video.
2. Plan Your Script and Storyboard
Grab a pen and paper and outline your script. Break your idea into concise sections that flow logically. Next, sketch a quick storyboard to visualize each scene. This doesn’t need to be perfect, just a guide to keep you organized.
3. Gather Your Assets
Collect everything you’ll need for your video:
Videos and Images: Capture your own footage or find high-quality visuals online.
Voice-over: Record your narration or use a text-to-speech (TTS) tool.
Music and Sound Effects: Find royalty-free options or use CapCut’s built-in library.
Logos and Branding: Ensure consistency if the video is for commercial use.
SUMMARY
Creating a successful explainer video involves a few key steps:
Develop Your Idea: Define the purpose and message of your video.
Plan Your Script and Storyboard: Outline your script and sketch a rough storyboard for guidance.
Gather Your Assets: Collect all visuals, audio, and branding materials needed for the video.
Open CapCut and Import Assets: Upload your assets into CapCut and prepare to edit.
Arrange Your Timeline: Organize your clips and visuals to match the storyboard.
Edit and Adjust: Refine your video by trimming, adding transitions, enhancing visuals, and syncing audio.
Finalize and Export: Preview, make final tweaks, and export your polished video.
By following these steps, you’ll be well on your way to creating an engaging explainer video with CapCut!
Can CapCut Create Professional Videos?
Absolutely! However, while CapCut provides excellent tools, creating professional-grade videos often requires experience and a keen eye for detail. Think of it like holding a pen: anyone can write, but not everyone can craft a masterpiece.
If you want an explainer video that truly stands out and meets professional standards, why not let us help? At Octobox Studio, we specialize in creating high-quality explainer videos in various styles. Let us handle the heavy lifting so you can focus on running your business.
Ready to Create Amazing Videos?
Creating explainer videos with CapCut is straightforward and fun, but for top-notch results, consider partnering with experts. Contact us to explore how we can bring your ideas to life. Don’t forget to follow us on social media for more tips, tutorials, and inspiration on video creation and branding.
Let’s create something incredible together!
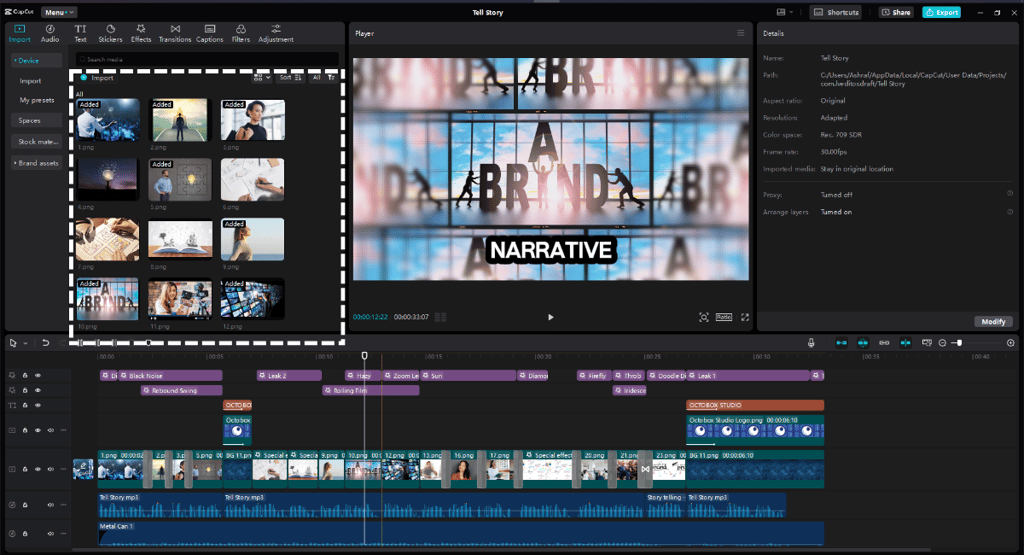
4. Open CapCut and Import Assets
Whether on your phone or computer, start by importing your collected assets into CapCut’s library. The platform offers a similar experience across devices, so choose what’s most convenient for you.
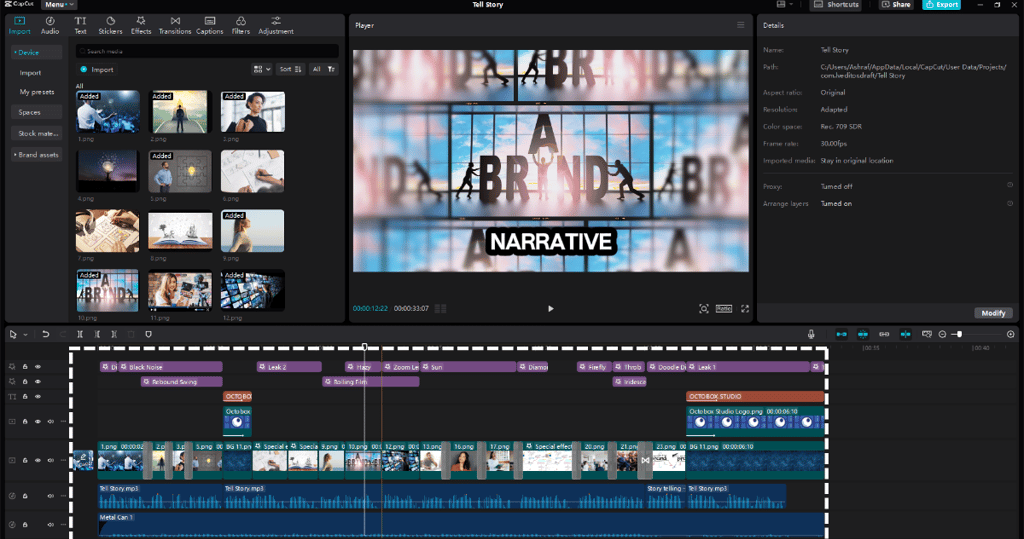
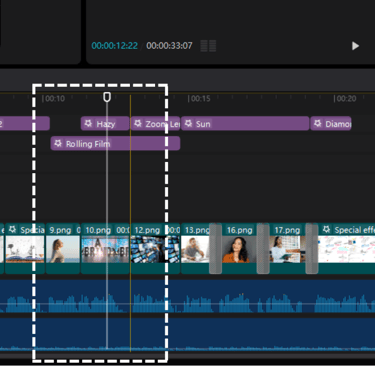
5. Arrange Your Timeline
Drag your assets to the timeline in the order outlined in your storyboard. Organize the visuals to match the flow of your script.
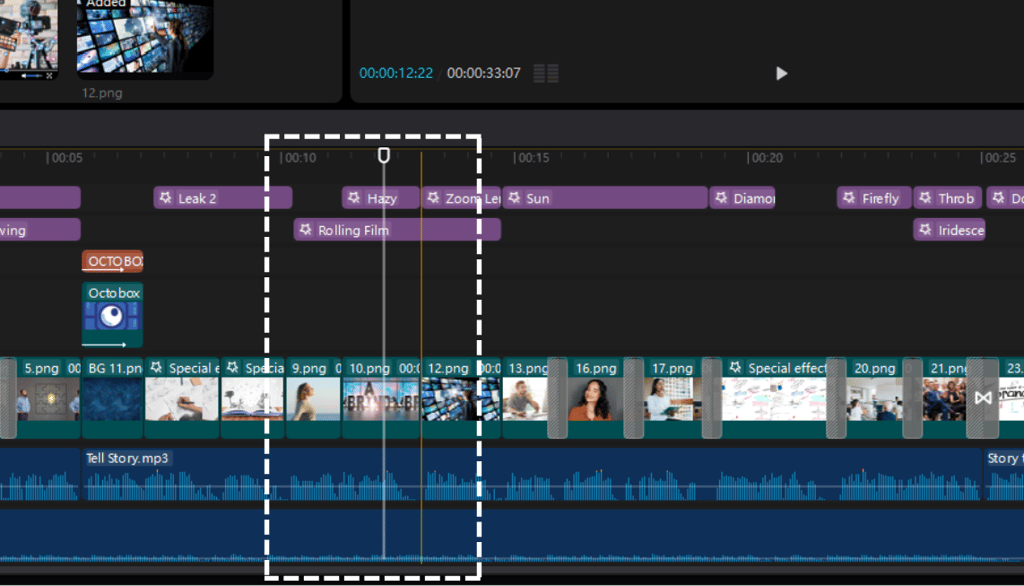
6. Edit and Adjust
Begin refining your video:
Trim and Cut: Sync your visuals with the voice-over or background music.
Transitions: Add smooth transitions between clips for a polished look.
Filters and Effects: Enhance visuals with CapCut’s effects and adjust colors for a professional touch.
Sound Adjustments: Balance your audio and add sound effects to make the video dynamic.
Captions and Stickers: Include captions for accessibility and use stickers to emphasize points.
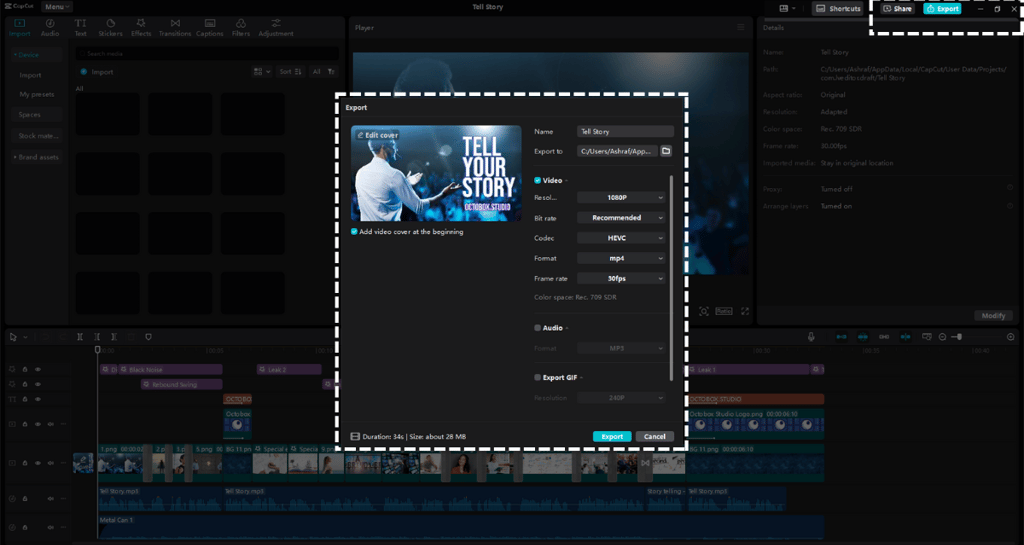
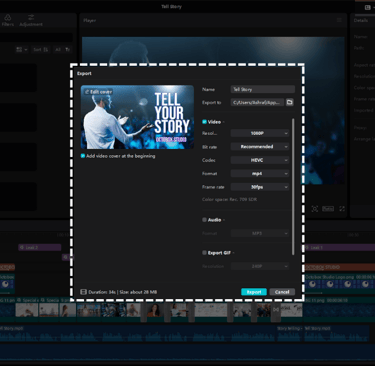
7. Finalize and Export
Once you’re satisfied with your edits, preview your video, make final tweaks, and export it in your desired format. Now you’re ready to share your explainer video with the world!
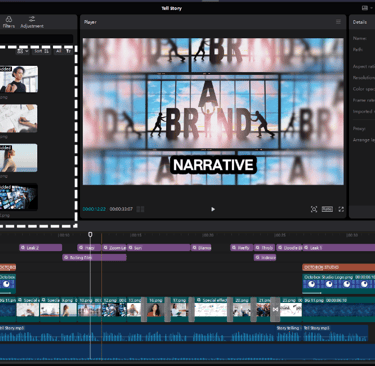

Trim and Cut
Transitions, Effects, and Filters
Octobox Studio
Creating tailored 2D explainer videos for businesses.
Contact us
© 2024. All rights reserved.